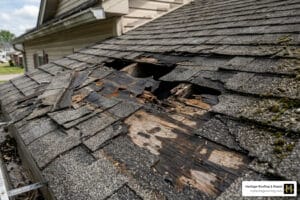
A Leaking Shingle Roof Can Cost You Thousands — Here’s How to Fix It Fast
Shingle roof leak repair is a critical maintenance task that prevents minor drips from becoming major structural failures. To fix a leaking shingle roof, you must first locate the source in the attic, identify damaged components like cracked shingles or rusted flashing, and apply roofing cement or replace the shingles entirely. As the most trusted roofing company in Berryville, Heritage Roofing & Repair recommends addressing leaks immediately to avoid mold and wood rot.
Quick answer: How to repair a leaking shingle roof
- Find the leak — Check ceilings for water stains, then inspect your attic with a flashlight.
- Identify the damage — Look for cracked, curled, or missing shingles, and check flashing around vents and chimneys.
- Make the repair — Apply roofing cement to curled shingles, seal cracks, or replace missing shingles entirely.
- Test your fix — Use a garden hose to simulate rain and confirm the leak is sealed.
- Prevent future leaks — Inspect your roof twice a year, in spring and fall.
Asphalt shingles cover nearly 70% of American homes, and while a quality installation can last up to 30 years, Arkansas storms can punch through that protection faster than you’d expect. The good news? Many common leaks are fixable with basic tools and a careful approach. This guide walks you through the entire process — from finding the source to sealing it for good. If you’d rather leave it to the pros, Heritage Roofing & Repair’s roof repair service is a trusted option for homeowners in Berryville and surrounding communities.
I’m Rex Wisdom, owner of Heritage Roofing & Repair — a family-run business with over 50 years of combined experience in shingle roof leak repair across Northwest Arkansas. I’ve seen how a simple missed shingle can turn into a five-figure structural problem, and I’m here to help you avoid that.

Shingle roof leak repair terminology:
Identifying the Source of Your Shingle Roof Leak Repair

Before you can fix the problem, you have to find it. Finding the exact entry point of a leak is often the hardest part of any shingle roof leak repair. Water is sneaky; it rarely travels in a straight line. It often enters through a gap in the shingles, runs down a rafter, and finally drips onto your ceiling several feet away from the actual hole.
Interior Clues
Start inside your home. If you see a water stain, take a pencil and lightly mark the outer diameter of the spot. This helps you monitor if the leak is growing during the next rainstorm. If the spot is damp but not dripping, you are likely catching a slow leak before it becomes a disaster. For more detailed help on this stage, check out our Roof Leak Detection Guide.
Attic Investigation
The most reliable way to find a leak is to go into your attic with a bright flashlight. If it is currently raining, look for the “glisten” of water on the underside of the roof decking or along the rafters. If it’s dry outside, look for dark water stains, mold, or “trails” left by minerals in the water.
If you still can’t find it, we recommend the “hose method.” This requires two people: one on the roof with a garden hose and one in the attic with a flashlight. Start low on the roof, spraying water near vents or chimneys, and wait a few minutes before moving upward. Your helper in the attic will yell when they see the first sign of moisture.
Roof vs. Plumbing
Don’t start tearing up shingles until you’re sure the roof is actually the culprit. If you notice a leak that occurs even when it hasn’t rained for days, you are likely dealing with a plumbing issue. Check the proximity of the leak to upstairs bathrooms or kitchen lines. Conversely, if the drip only happens during a heavy downpour or when snow is melting, it’s almost certainly a roofing issue.
Visual Cues
You don’t always have to climb a ladder to inspect your roof. Use a pair of binoculars to scan your roof from the safety of the ground. Look for:
- Missing granules: Areas that look “bald” or dark.
- Cracked or torn shingles: Often caused by wind or falling debris.
- Lifted flashing: Metal plates around chimneys that have pulled away from the brick.
Essential Tools and Safety for DIY Roof Fixes
Safety is our number one priority at Heritage Roofing & Repair. Working on a roof is inherently dangerous, especially if the pitch is steep or the shingles are wet.
Safety First
- Never work alone: Always have a helper to steady the ladder and keep an eye on you.
- Proper footwear: Wear soft, rubber-soled shoes. They provide the best traction on asphalt shingles.
- Check the weather: Only attempt a shingle roof leak repair on a dry, clear day. Even a little bit of morning dew can make a roof as slippery as ice.
- Ladder safety: Ensure your ladder extends at least three feet above the roof edge and is planted on firm, level ground.
Required Materials
To perform a basic repair, you will need:
- A flat pry bar (for lifting shingles and pulling nails)
- A hammer
- A utility knife
- 6d galvanized roofing nails (rust-resistant)
- A tube of asphalt roofing cement or sealant
- A caulk gun
Temporary Containment
If you find a leak during a storm and can’t get on the roof yet, you must contain the water to prevent your ceiling from collapsing. Place a bucket under the drip. If the ceiling is bulging, use a screwdriver to poke a small hole in the center of the bulge. This might seem counterintuitive, but it allows the water to drain into the bucket rather than spreading out and soaking the entire ceiling structure.
Weather Considerations
Timing matters. Asphalt shingles are made of oil and granules; they become brittle in the cold and soft in the heat. We suggest performing repairs when it is at least 70 degrees outside. If it’s too cold, the shingles may crack when you try to lift them. In the summer heat of Arkansas, shingles can become so soft that you might scuff off the protective granules just by walking on them.
Step-by-Step Shingle Roof Leak Repair for Common Damage
Once you’ve identified the problem and gathered your tools, it’s time to get to work. Most shingle issues fall into three categories: curling, cracking, or missing entirely.
Fixing Curled Edges
Over time, heat and age can cause the corners of shingles to curl upward. This allows wind-driven rain to blow right underneath them.
- Lift the curled corner gently.
- Apply a liberal amount of roofing cement to the underside using a putty knife or caulk gun.
- Press the shingle down firmly.
- Pro Tip: Weigh the shingle down with a brick for 24 hours to make sure the bond sets properly.
Repairing Cracked or Torn Shingles
If a shingle is simply cracked (perhaps from a fallen branch), you don’t always need to replace it.
- Apply a thick bead of roofing sealant underneath the crack.
- Press the shingle down to squeeze the sealant through the crack.
- Apply another bead of sealant over the top of the crack and smooth it out.
- For more details on this, see our Asphalt Shingle Repair Complete Guide.
Replacing Missing Shingles for a Permanent Shingle Roof Leak Repair
If a shingle is completely gone, you’ll need to install a new one.
- Remove the old nails: Use your pry bar to lift the shingles in the row above the missing one. You’ll find the nails for the damaged shingle hidden there. Carefully pry them out.
- Slide out the debris: Remove any remaining pieces of the old shingle.
- Prepare the new shingle: Use a utility knife to slightly round the back corners of the new shingle. This makes it much easier to slide into place.
- Install: Slide the new shingle into the gap. Secure it with four new galvanized nails.
- Seal: Apply a small dab of roofing cement over each nail head to ensure they are watertight.
Granule Camouflage
A fresh repair can sometimes stand out like a sore thumb. To help the new sealant blend in, go to your gutters and scoop up some of the loose granules that have washed off over time. Sprinkle these granules over the wet roofing cement. It acts like “roofing glitter” that hides the repair and protects the sealant from UV rays.
Fixing Flashing and Penetrations Around Vents and Chimneys
Shingles aren’t always the problem. In fact, most leaks occur at “penetrations”—places where something sticks out of your roof, like a chimney, vent pipe, or dormer wall.
Vent Boot Replacement
Plumbing vents have a rubber “boot” or gasket that seals the pipe. Over 10 to 15 years, the Arkansas sun bakes this rubber until it cracks. If you see water dripping in your bathroom ceiling, check the vent boot directly above it. If it’s cracked, we recommend replacing the entire boot rather than just patching it. Secure the new boot with washer-head roofing screws to create a tight seal.
Step Flashing Maintenance
Chimneys and dormers use L-shaped metal pieces called step flashing. These are tucked under the shingles and the siding to channel water away. If the sealant at the top of the flashing has dried out, water can seep behind it. Clean out the old debris and apply a fresh, heavy bead of roofing cement to the joints.
Dormer Walls
The “valleys” where a roof meets a vertical dormer wall are high-traffic areas for water. Check the caulking along these lines. If the caulk is peeling or missing, water will get behind your siding and rot your wall studs before you ever see a drip on the ceiling.
Old Mounting Holes
Did you recently switch to fiber internet and remove an old satellite dish? Those mounting bolts left holes right through your roof. To fix this, don’t just fill the hole with caulk. Slide a small 3×3 inch square of sheet metal (flashing) under the shingle above the hole, then seal the area with roofing cement.
When to Call a Professional
While we love a good DIY project, some jobs are simply too big or too dangerous for a homeowner to tackle alone. Knowing when to call in the pros can save you from a hospital bill or a collapsed roof. Generally, if your roof is over 20 years old, you might be facing issues that a simple patch can’t fix; you can learn more about this in our Shingle Roof Repair Guide 2025. Regular professional inspections in the spring and fall can also help identify these issues before they become emergencies.
Signs of Structural Trouble
Call Heritage Roofing & Repair immediately if you notice:
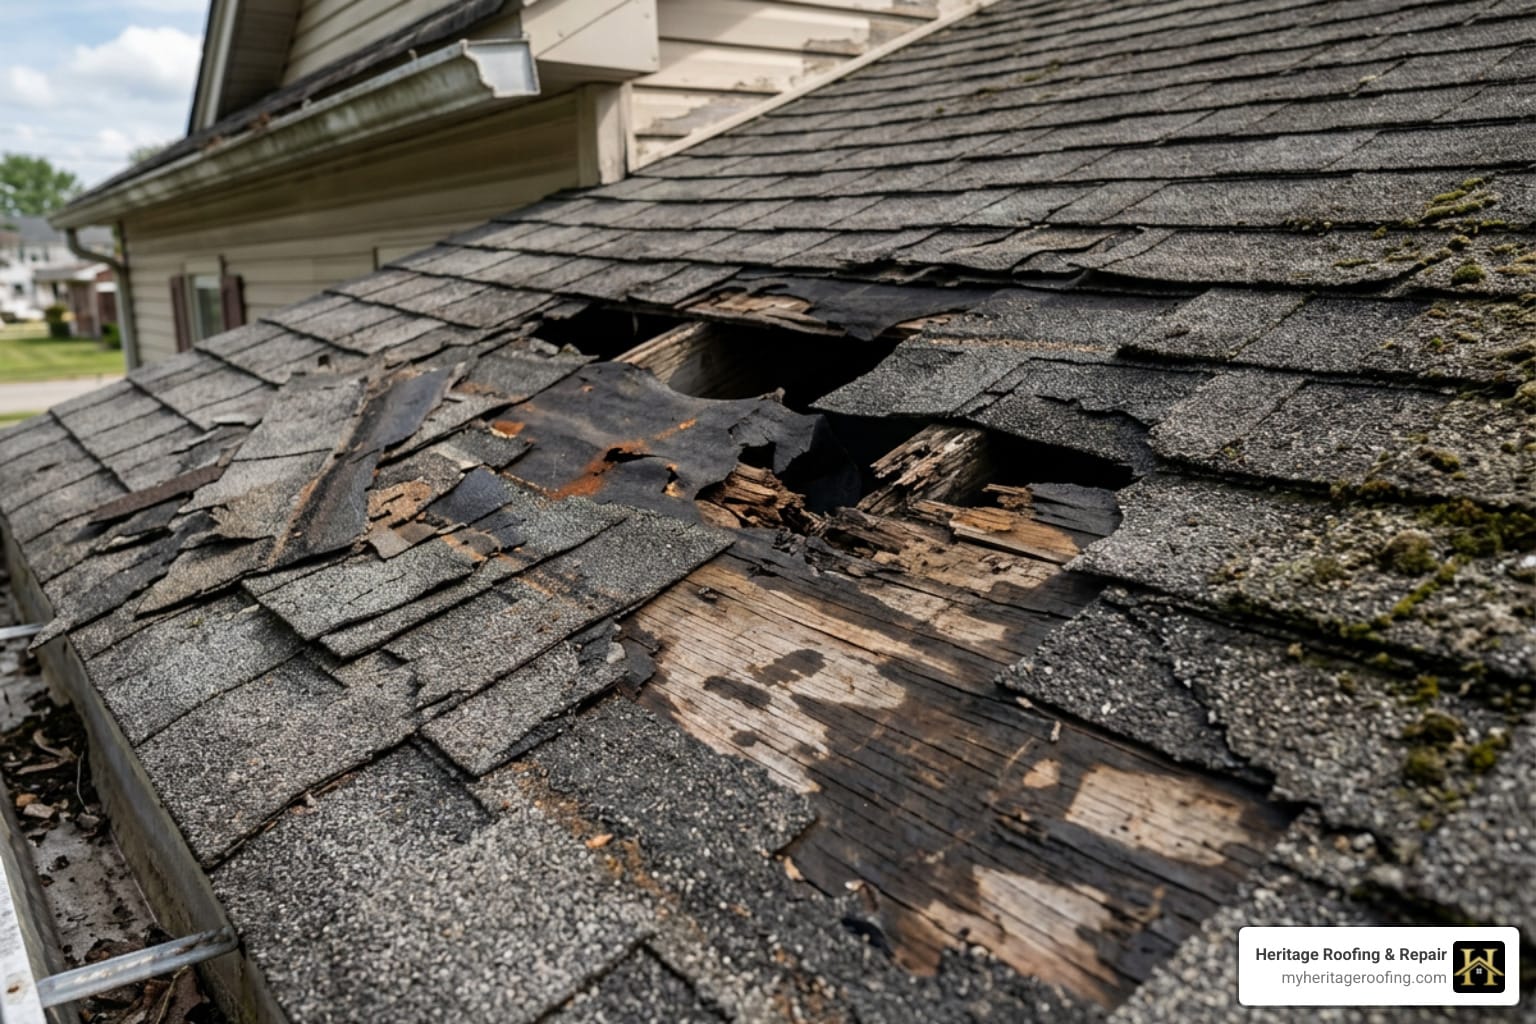
- A sagging roofline: This indicates that the internal rafters have been weakened by long-term water damage.
- Large-scale damage: If more than 25% of your shingles are damaged or missing after a storm, a patch job won’t be enough.
Heritage Roofing & Repair 3458 Arkansas State Hwy 221, Berryville, AR 72616 (870) 654-1164
Frequently Asked Questions about Shingle Roofs
How much does a typical shingle roof leak repair cost?
Most minor repairs for individual shingles or small flashing issues cost between $200 and $1,000. Factors affecting the price include the roof’s pitch, the height of the home, and the extent of the underlying water damage to the decking. If you need a detailed breakdown, see our Roof Repair Cost Guide.
Can I repair a roof leak from the inside?
No, you cannot permanently fix a roof leak from the inside. While you can use buckets or plastic to divert water temporarily, the actual entry point on the exterior must be sealed. Patching from the inside just traps the water inside your roof structure, which accelerates wood rot and mold growth.
How do I know if I need a repair or a full replacement?
If the damage is localized to one area (like a tree branch hit) or a few shingles, a repair is usually sufficient. However, if the shingles are “cupping” (edges turning up), losing significant granules, or the roof is over 20 years old, a full replacement is more cost-effective. For a professional opinion, you can read our Roof Repair Estimate Complete Guide.
Conclusion
A roof leak is a race against time. Whether you choose to tackle the shingle roof leak repair yourself or hire a professional, the key is to act before the next Arkansas thunderstorm turns a small drip into a major renovation.
Heritage Roofing & Repair provides dependable, affordable, and quality craftsmanship for homeowners facing unexpected leaks. With over 50 years of experience in Berryville, AR, our team specializes in storm damage assessment and insurance claims to ensure your home remains protected. We pride ourselves on integrity-if your roof doesn’t need a full replacement, we’ll tell you honestly and provide the most effective repair possible.
For a professional evaluation of your roof’s condition, visit our Berryville location page to schedule your free inspection today. Don’t wait for the puddle to grow-contact us and let us put our 50 years of experience to work for you.