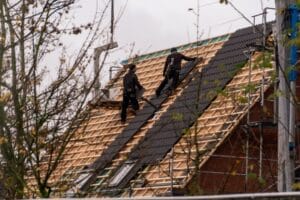
EPDM Roof Installation: The 30-Year Solution for Ultimate Property Protection
EPDM roof installation is a proven solution that can protect your property for up to 30 years with minimal maintenance, making it a cornerstone of our expert roofing services. This synthetic rubber membrane system offers exceptional durability and weather resistance, making it the most widely used single-ply roofing system worldwide with 200 million square meters installed annually.
Quick EPDM Installation Overview:
- Prepare the roof deck – clean, dry, and smooth surface
- Position and relax membrane – allow 30 minutes for expansion
- Apply bonding adhesive – use water-based or contact adhesive
- Secure the membrane – roll out air bubbles and ensure full contact
- Seal all seams – use primer, tape, and lap sealant
- Flash penetrations – install pipe boots and custom flashing
- Finish edges – terminate with proper trim and sealant
The installation process requires careful attention to detail, proper materials, and ideal weather conditions. Water-based adhesives should only be applied when temperatures are above 40°F and rising, with no freezing conditions expected for 24-48 hours.
As many contractors recall from their early EPDM projects, “the first EPDM installation about eight years prior to the article’s publication marked a significant improvement in their roofing work” – highlighting how this technology revolutionized flat roofing solutions.
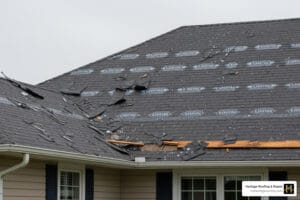
For homeowners and business owners in Berryville facing storm damage or aging roof systems, professional roof installation ensures proper technique and long-term performance. I’m Rex Wisdom, owner of Heritage Roofing & Repair, where our family has provided expert EPDM roof installation services throughout Northwest Arkansas for over 50 years. Our hands-on approach and deep community roots ensure your roofing project receives the careful attention it deserves.

Pre-Installation Essentials: Planning for a Perfect EPDM Roof
Proper planning is the foundation of a successful EPDM roof installation. Before unrolling a single sheet of membrane, it’s crucial to gather the right materials, understand the system types, and commit to stringent safety protocols. This preparation prevents costly mistakes and ensures a roof that performs for decades.

Tools, Materials, and System Types
At its heart, EPDM (Ethylene Propylene Diene Monomer) is a synthetic rubber membrane that has revolutionized flat and low-slope roofing. Its advantages over traditional roofing materials are numerous: EPDM offers superior flexibility, exceptional durability, and resistance to UV rays, ozone, and extreme temperatures. Unlike older asphalt roll roofing, which often led to leaks and messy installations, EPDM creates a monolithic, watertight barrier. It’s often compared to a giant inner tube for your roof, but much tougher! EPDM roofing systems show no similar signs of deterioration with aging and can last up to 30 years.
EPDM membranes are available in two primary thicknesses: 0.045 inches and 0.060 inches. While both are durable, the 0.060-inch thick membrane is often recommended for fully adhered systems and for roofs that will experience foot traffic or have heavy items placed on them, offering added durability. These membranes are typically sold in large rolls, commonly 10-ft. by 50-ft. or 10-ft. by 100-ft., though some manufacturers offer sizes up to 50-ft. by 200-ft. for large commercial projects. This allows for fewer seams, which are often the weakest points in any roofing system.
When it comes to EPDM roof installation, there are three main system types, each with its own advantages:
| System Type | Weight | Best Use Case | Installation Complexity |
|---|---|---|---|
| Fully Adhered | Lightweight (less than 2 lbs/sq. ft.) | Roof replacement, high-slope, complex geometries | Moderate |
| Mechanically Attached | Lightweight | All building sizes, configurations, steep slopes | Moderate |
| Ballasted | Heaviest (approx. 10-12 lbs/sq. ft.) | Large new construction, structures supporting weight | Low |
Let’s dig a bit deeper into the types of EPDM membranes and accessories we use:
- Standard EPDM: This is the basic, versatile membrane that accounts for about 30% of all commercial roofing materials. It’s cost-effective and suitable for a wide range of applications.
- Fleece-Backed EPDM: This variant has a polyester fleece bonded to its underside. It’s thicker than standard EPDM and allows for better adhesion to challenging deck surfaces like concrete or gypsum. It also provides improved puncture resistance, making it ideal for less-controlled roof settings or areas with potential heavy traffic.
- Reinforced EPDM: This membrane incorporates a polyester fabric internal reinforcement. It offers superior tensile strength and puncture resistance, stretching to over 300% beyond its original dimension (compared to 2-3% for traditional built-up roofing). Reinforced EPDM is the best option for roofs with heavy traffic or those vulnerable to high winds or extreme temperatures. It remains flexible even at temperatures down to -45°C.
For a successful EPDM roof installation, we rely on a specific array of adhesives, primers, and sealants:
- Bonding Adhesive: Used to secure the EPDM membrane to the roof deck. These come in water-based (more eco-friendly, but temperature-sensitive) and solvent-based varieties (stronger initial bond, better in cooler temps).
- Seam Primer: A crucial pre-treatment applied to the EPDM surface before applying seam tape. It cleans and prepares the surface, ensuring a strong, molecular bond.
- Seam Tape: A pressure-sensitive adhesive tape used to create watertight seals between overlapping EPDM membrane panels.
- Lap Sealant: Applied along the exposed edges of seams and flashing details for an added layer of protection against moisture intrusion.
- Flashing: Various products like pre-formed pipe boots, uncured EPDM flashing tape, and pressure-sensitive flashing are used to seal around penetrations, edges, and corners.
- Insulation Board: Often installed beneath the EPDM membrane to improve thermal performance and provide a smooth substrate.
- Drip Edge and Termination Bars: Metal or plastic components used to secure the membrane at roof edges and vertical transitions.
Our essential tools include utility knives, rollers (both hand and weighted), seam rollers, measuring tapes, chalk lines, adhesive applicators, and caulking guns.
Critical Safety Precautions
Safety is paramount on any roofing project, and EPDM roof installation is no exception. We adhere to strict safety protocols to protect our team and your property.
- Personal Protective Equipment (PPE): Our crew always wears sturdy shoes with good grip, gloves (especially solvent-resistant gloves when handling adhesives), safety glasses or goggles, and hard hats.
- Weather Awareness: We carefully monitor weather forecasts. EPDM installation requires dry conditions. Rain, snow, or ice can compromise adhesion.
- Installation Temperature: Most manufacturers recommend installing EPDM when ambient temperatures are 40°F (5°C) and rising. Adhesives and primers perform best in mild, dry weather. In colder conditions, adhesives and primers dry slower, and condensation can form on surfaces, which must be avoided. Conversely, in very hot weather, adhesives can dry too quickly, requiring us to work in smaller sections.
- Adhesive Vapor Safety: When working with solvent-based adhesives, proper ventilation is crucial. We close nearby windows, doors, and air intakes to prevent fumes from entering the building. All adhesives, sealants, and cleaners are kept away from ignition sources, and we never smoke near these materials.
- Ladder Safety & Fall Protection: Ladders are always securely tied off, and we are constantly aware of our surroundings, especially near roof edges. For larger projects, fall protection systems are put in place.
- Working with a Partner: We never work alone. Having a partner on the roof provides an extra set of hands and an immediate response in case of an unforeseen incident.
For a more visual understanding of the process, you can explore A visual guide to the installation process.
The Step-by-Step EPDM Roof Installation Process
With over 200 million square meters installed annually worldwide, the EPDM installation process is well-refined. Following these methodical steps is essential for creating the seamless, watertight barrier that EPDM is known for. This section details the core process, from preparing the deck to adhering the membrane.
Step 1: Key Steps for Roof Deck Preparation Before EPDM Roof Installation
The foundation of a long-lasting EPDM roof is a properly prepared deck. This step is non-negotiable for success.
- Tear-off Old Roofing: In most cases, we recommend a full tear-off of the existing roof system down to the structural deck. This allows us to thoroughly inspect the substrate and ensures the new EPDM membrane has the cleanest, most reliable surface to bond to. While sometimes it’s possible to install EPDM over an existing roof, it can hide underlying issues and may void manufacturer warranties.
- Inspect Substrate: We carefully inspect the entire roof surface for any structural issues, such as soft spots, rotting wood, or water damage. Any damaged decking or insulation is replaced to ensure a solid and stable base.
- Clean Surface: The roof surface must be swept clean of all dirt, grease, dust, and debris. Any residual bitumen from an old roof should be removed or over-boarded to prevent incompatibility issues. EPDM products will not adhere properly to wet or contaminated surfaces.
- Ensure Proper Slope: While EPDM is excellent for flat roofs, a truly “flat” roof can lead to ponding water, which can affect the long-term performance of any roofing system. We ensure a minimum 1/4 inch per foot roof slope to assure proper drainage and maintain the integrity of the new roof system.
- Fill Gaps & Create Smooth Surface: Any gaps in the roof deck larger than 1/4 inch are filled with wood strips or appropriate patching materials. The goal is a smooth, even surface free of protrusions that could damage the membrane. High-density wood fiberboard or polyisocyanurate insulation boards are often installed as a smooth, protective layer over the deck.
For more information on preparing your roof for any new system, it’s always best to consult with a professional.
Step 2: Membrane Positioning and Relaxation
Once the deck is prepped, it’s time to handle the EPDM membrane. This step is critical for preventing wrinkles and ensuring a smooth, aesthetically pleasing, and functional finish.
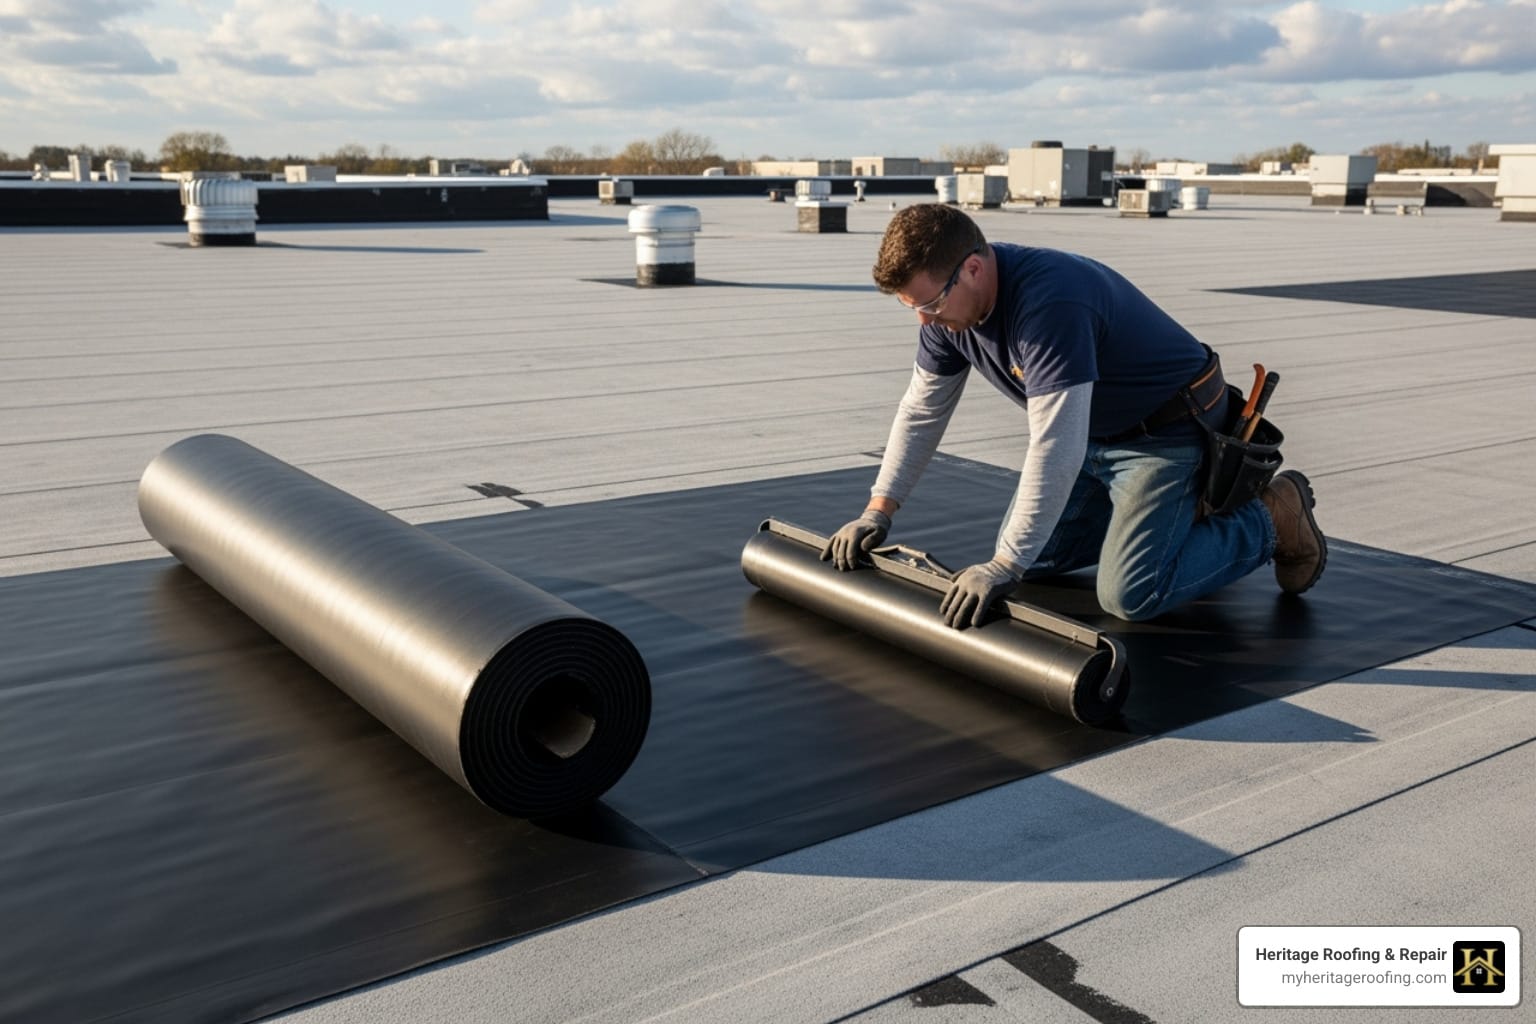
- Unroll Membrane: We carefully unroll the EPDM membrane over the prepared roof deck. Depending on the roof’s size, we might use one large sheet or multiple smaller ones that will later be seamed together.
- Position with Overhang: The membrane is positioned to allow for adequate overhang at all edges and around any penetrations. This ensures we have enough material to properly flash and terminate the system.
- Allow 30-Minute Relaxation: This is a crucial step! After unrolling, we allow the EPDM membrane to relax in position for at least 30 to 60 minutes. This relaxation period allows the synthetic rubber to naturally expand and contract, eliminating wrinkles and preventing future shrinkage or movement that could stress seams and flashing. Think of it like letting dough rise before baking – it needs time to settle.
This careful positioning is vital for single-ply roofing systems, as the membrane itself forms the primary waterproof barrier.
Step 3: Adhesive Application: The Core of Your EPDM Roof Installation
The adhesive application is where the EPDM membrane truly becomes part of your roof. It’s a delicate balance of timing and coverage.

- Choosing the Right Adhesive: We select between water-based and solvent-based bonding adhesives based on job specifics and environmental conditions. Water-based adhesives are often more eco-friendly and easier to apply, while solvent-based options offer stronger initial bonds and perform better in cooler temperatures. Always remember the temperature requirements: water-based adhesives should only be used when temperatures are 40°F (5°C) and rising, with no chance of freezing in the next 24-48 hours.
- Perimeter Bonding: For a fully adhered system, we typically apply bonding adhesive to both the roof deck and the underside of the EPDM membrane. We often work in sections, folding back half of the membrane to expose the deck.
- The ‘Tack Test’: For contact adhesives, a critical step is the ‘tack test’. After applying adhesive to both surfaces, we wait until it’s “touch-dry” – meaning it’s tacky but doesn’t transfer to a clean finger. If it’s still wet and sticky, we wait longer. This ensures optimal bond strength and helps prevent air bubbles.
- Smooth Application: Using a 9-inch paint roller or specialized applicator, we apply a thin, even coat of adhesive. For the main roof surface, we typically leave a 100mm to 150mm un-bonded area around the perimeter. This perimeter section will receive a coat of contact adhesive for a stronger bond at edges and upstands.
- Preventing Bubbles: After applying the adhesive, the membrane is carefully rolled back into place. We use a push broom for initial smoothing, working from the center outwards to push any trapped air pockets towards the edges. A heavy steel or rubber roller is then used to apply firm, even pressure across the entire surface, ensuring complete adhesion and squeezing out any remaining air. If bubbles do appear, especially with contact adhesive that might have been bonded before fully dry, they should often disappear over time as EPDM is breathable.
Step 4: Seaming for a Watertight Finish
Seams are the vulnerable points of any membrane system, and mastering them is essential for ensuring a watertight seal.
- 3-inch Seam Overlap: When joining multiple EPDM sheets, we ensure a minimum 3-inch overlap between membranes. This provides ample surface area for a robust seal.
- Apply Tape Primer: The overlapping surfaces of the EPDM membrane are first cleaned and then treated with a specialized seam primer using a scrub pad. This primer cleans the surface of any contaminants and activates the EPDM, preparing it for the seam tape. It’s crucial that the primer is touch-dry before proceeding.
- Install Seam Tape: A 3-inch wide pressure-sensitive seam tape is then carefully laid onto the primed surface, centered on the overlap. We ensure there are no wrinkles or creases in the tape. This tape creates a molecular bond between the two EPDM sheets.
- Use a Steel Roller: Once the seam tape is in place, we use a heavy steel or silicone hand roller to apply firm, consistent pressure along the entire length of the seam. This ensures complete contact between the EPDM membrane and the seam tape, eliminating air pockets and creating a strong, monolithic seal.
- Apply Lap Sealant: As an added layer of protection, a bead of EPDM lap sealant is applied along the exposed edge of all seams. This sealant acts as a secondary barrier against moisture and helps protect the seam from UV degradation. This best practice helps ensure a watertight seal at all junctions.
Mastering Critical Details: Flashing and Penetrations
The true test of any roofing system lies in its details. Properly flashing edges, corners, and penetrations is what separates a good roof from a great one. These areas are the most vulnerable to leaks, and EPDM offers specific components and techniques to ensure they are permanently sealed.

Handling Edges, Corners, and Upstands
Roof edges, corners, and wall upstands are critical areas that require meticulous attention to prevent leaks.
- Drip Edge Termination: At the eaves, where water drains off the roof, we install a drip batten (if a gutter is present) to extend the roof deck, ensuring water drips into the gutter rather than behind it. The EPDM membrane is then extended over the edge and secured with a drip edge trim. This trim often comes in two pieces: a back piece secured to the fascia and a front piece that snaps on, holding the membrane in place.
- Wall Flashing & Termination Bar: Where the EPDM roof meets a vertical wall or parapet, we extend the membrane up the wall a minimum of 8 inches (where possible). For brick walls, we often “chase out” the mortar joint with an angle grinder or mortar chisel to create a slot for the wall trim flashing. The EPDM is secured to the wall with a termination bar, a thin metal or plastic strip fastened every 6 inches. The top edge of the termination bar is then sealed with water cut-off mastic and appropriate caulking to prevent water ingress.
- ‘Pig’s Ear’ Fold for Corners: For both inside and outside corners, we employ specific folding techniques to create a seamless, watertight transition without cutting the main membrane. For an outside corner, we carefully fold the EPDM membrane by pinching it to form a ‘pig’s ear’ shape. This fold is then flattened and adhered to the side of the roof, and a pre-formed trim corner is often placed over it, secured with polypins. For inside corners, similar precise folding and adherence techniques are used, often combined with specialized EPDM corner patches.
- Curb Flashing: For roof curbs (e.g., around skylights or HVAC units), the EPDM membrane is typically cut to roll up two sides of the curb, and separate, custom-cut pieces of EPDM are used for the remaining two sides. These pieces are then seamed to the main membrane and to each other, ensuring a continuous, watertight barrier.
Sealing Around Pipes, Vents, and Skylights
Penetrations are notorious leak points if not handled correctly. EPDM offers robust solutions for these challenges.
- Pre-Fabricated Pipe Boots: For round pipes and vents, we use pre-fabricated EPDM pipe boots. These conical rubber pieces are designed to fit snugly around the pipe. The base flange of the boot is then adhered and seamed to the main EPDM membrane using seam tape and primer. The top of the boot is secured to the pipe with a clamping ring or sealant.
- Uncured Flashing Tape: For irregular penetrations, such as square vents or odd-shaped supports, we use uncured EPDM flashing tape. This highly pliable, self-adhering tape can be molded and stretched to conform to complex shapes. It’s applied over a primed surface and thoroughly rolled to ensure complete adhesion, creating a custom watertight seal.
- Custom Flashing: For larger or more complex penetrations like skylights or HVAC curbs, we custom-cut EPDM membrane pieces. These pieces are adhered and seamed to the main membrane, extending up the sides of the penetration and secured with termination bars and sealants at the top edge. The goal is always to ensure a watertight seal at all junctions, no matter how intricate.
After the Install: Longevity, Costs, and Finding an Expert
A successful EPDM installation provides long-term peace of mind. Understanding the minimal maintenance required, typical costs, and when to call a professional will help you maximize your investment and keep your building protected for years to come.
EPDM Lifespan, Maintenance, and Cost
One of EPDM’s biggest selling points is its impressive longevity. EPDM roofing systems show no similar signs of deterioration with aging and can last up to 30 years or even longer. In fact, many EPDM roofs installed in the 1960s and 70s are still performing without problems today, often exceeding their initial 20-year guarantees. This proven long-term performance makes EPDM an excellent investment for your property’s commercial roofing system.
Maintenance requirements for an EPDM roof are remarkably minimal. Regular inspections (at least annually) are key to catching any potential issues early. We recommend:
- Debris Removal: Keeping the roof clear of leaves, branches, and other debris prevents standing water and potential punctures.
- Gentle Cleaning: If cleaning is needed, a mild detergent and water with a soft brush are usually sufficient. Avoid harsh chemicals or high-pressure washers, which can damage the membrane.
- Prompt Repairs: Though rare, if a puncture or loose seam occurs, prompt repair is crucial. EPDM is relatively easy to patch, but it’s best left to professionals to ensure the repair is watertight and maintains the roof’s integrity.
Regarding cost, EPDM roofing costs between $4.00-$6.00 per square foot for materials and installation. This can vary based on factors like roof complexity, the chosen installation method (fully adhered systems might be slightly more due to adhesive costs), and regional labor rates. Compared to other flat roofing options, EPDM offers significant long-term value due to its durability and minimal maintenance, leading to a lower life-cycle cost.
It’s also worth noting EPDM’s performance in different climates. While standard black EPDM absorbs heat (which can be beneficial in colder climates to reduce heating costs), white EPDM is available for improved reflectivity. White EPDM uses titanium dioxide to reflect UV rays, keeping the roof surface and the building interior cooler. In warm climates, white EPDM can be up to 80 degrees cooler than black EPDM, leading to significant energy savings on air conditioning.
Finding a Certified EPDM Installer in Berryville, AR
While the steps for EPDM roof installation can seem straightforward, achieving a flawless, long-lasting roof requires precision, experience, and adherence to manufacturer specifications. This is why we always recommend professional installation. A certified EPDM installer understands the nuances of different adhesives, flashing details, and environmental conditions, ensuring your roof performs as intended.
Working with a professional means your installation will be backed by manufacturer warranties, which typically guarantee the membrane for at least twenty years. These warranties often require installation by approved contractors who have proven to maintain high standards. For expert EPDM installation in the Berryville area, it’s crucial to partner with an experienced contractor.
At Heritage Roofing & Repair, we bring over 50 years of trusted experience to every project. Our commitment to dependable, affordable, and quality craftsmanship means your EPDM roof will be installed to the highest standards, protecting your property for decades. We specialize in storm damage repair and insurance claims, ensuring we’re here for you from start to finish.
Heritage Roofing & Repair
3458 Arkansas State Hwy 221, Berryville, AR 72616
(870) 654-1164
Frequently Asked Questions about EPDM Installation
How long does an EPDM roof last?
When installed correctly, an EPDM roof can last 30 years or more. Many of the first EPDM roofs installed in the 1970s are still performing well today. Longevity depends on proper installation, quality materials, and regular Roof Maintenance.
Can you install EPDM over an existing roof?
While it is sometimes possible, a full tear-off is almost always recommended. Installing over an old roof can hide underlying deck damage and may void manufacturer warranties. A clean, sound substrate is essential for the best performance and longevity. If an existing roof is in good condition and compatible, a new EPDM membrane can sometimes be laid over it, but this decision should only be made after a thorough professional inspection.
What is the best temperature to install an EPDM roof?
Most manufacturers recommend installing EPDM when ambient temperatures are 40°F (5°C) and rising. Adhesives and primers perform best in mild, dry weather, as cold can significantly slow curing times and moisture can compromise adhesion. Working in extreme heat can also cause adhesives to flash off too quickly, requiring faster work in smaller sections. Ideal conditions are typically between 40°F and 80°F with low humidity.
Your Partner for a Durable, High-Performance Roof
An EPDM roof is a significant investment in your property’s protection and value. By following these detailed installation steps—from meticulous preparation to mastering the critical details—you can achieve a durable, watertight, and long-lasting roofing system. For a flawless installation backed by over 50 years of trusted experience, consider the experts at Heritage Roofing & Repair. Our commitment to quality craftsmanship ensures your roof is built to last.
Ready to protect your investment with a top-tier EPDM roof? Explore our commercial roofing services to learn how we can help.