Why Metal Roof Installation is the Ultimate Home Upgrade
Metal roof installation is one of the smartest investments for your home, and choosing from the many comprehensive roofing services available is the first step. A properly installed metal roof can last 40-70 years—a significant upgrade from the 15-20 year lifespan of asphalt shingles—while offering superior durability, energy efficiency, and weather resistance.
Quick Metal Roof Installation Overview:
- Preparation – Remove old roofing and inspect the deck.
- Underlayment – Install a synthetic moisture barrier.
- Trim & Strips – Add drip edge and closure strips.
- Alignment – Square the roof for the first panel.
- Panel Installation – Fasten panels with proper overlap.
- Sealing – Apply butyl tape to seams.
- Finishing – Install ridge caps and flashing.
The process requires specific tools and techniques to ensure a watertight, long-lasting installation. While DIY is possible for some, professional installation guarantees proper technique and comes with workmanship warranties.

Metal roof installation vocab explained:
Gearing Up: Essential Tools, Materials, and Metal Choices
Proper preparation is the foundation of a successful metal roof installation. Gathering the right gear and materials ensures a smooth process and a durable result. You’ll need specific tools and materials to do the job right.
Tools & Materials Checklist
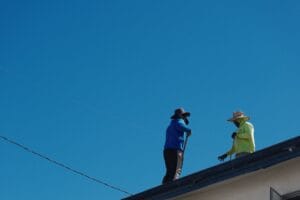
Safety is non-negotiable. Your gear must include a quality harness, non-slip boots, heavy-duty gloves for sharp metal edges, and safety glasses.
For measuring and layout, you’ll need a tape measure, chalk line, and a level to ensure your first panel is perfectly true. For cutting, metal snips (aviation snips) are for intricate cuts, while power shears or a nibbler handle larger cuts cleanly. A drill or screw gun with torque control is crucial for fastening, as over-tightening is a common mistake that leads to leaks.

For materials, order metal roofing panels with 10-15% extra for waste. Your high-temperature synthetic underlayment is the primary moisture barrier. Use self-tapping roofing screws with rubber washers for watertight seals. Finishing touches include drip edge, gable trim, ridge cap, closure strips, and butyl tape or sealant for seams and overlaps.
Choosing Your Metal: Steel vs. Aluminum vs. Copper
Your choice of metal impacts cost, longevity, and appearance. Steel is the durable, affordable workhorse for most climates, often coated with Galvalume for 30-50 years of service. Aluminum is naturally corrosion-resistant and ideal for coastal areas, though it comes at a moderate price premium. For a truly special look, copper and zinc are premium options that can last over 100 years and develop a beautiful, unique patina over time.
Here’s a quick comparison:
| Metal Type | Cost | Lifespan | Corrosion Resistance | Best For |
|---|---|---|---|---|
| Steel | Affordable | 30-50 years | Good (when coated) | General purpose, tough climates |
| Aluminum | Moderate | 30-50 years | Excellent | Coastal areas, industrial zones |
| Copper | Very High | 100-200 years | Excellent | High-end architectural designs |
Understanding Panel Profiles: Standing Seam vs. Corrugated
Your panel choice affects both aesthetics and performance. Standing seam panels feature interlocking raised ribs that hide all fasteners, creating a sleek, modern look with superior weather resistance. Corrugated panels have a classic wavy profile with exposed fasteners. They are more affordable and easier to install, making them a popular choice for rustic or industrial styles.
The Metal Construction Association developed installer training to reduce problems with both panel types, highlighting the importance of proper technique regardless of the style you choose.
Want to see the difference in action? Watch this comparison of Standing Seam Vs. Corrugated Metal Roofing to help you decide which profile suits your home best.
The Foundation: Preparing Your Roof for Metal Panel Installation
A metal roof is only as good as the deck it sits on. Proper preparation involves inspecting the existing structure and installing a robust water-shedding system to prevent leaks and moisture damage for the life of your roof.
Step 1: Roof Deck Inspection and Repair
Start with a complete tear-off of the old roofing. This is the only way to properly inspect the sheathing (the plywood or OSB deck) underneath. We strip away old shingles, flashing, and vents, and hammer down any protruding nails.
Next, we inspect the sheathing for rot, warping, or water damage, paying close attention to areas around chimneys, vents, and valleys. Any compromised sections are repaired or replaced. We also verify the roof has the proper pitch for metal panels (typically at least a 3:12 slope). Finally, we sweep the deck to create a clean and level surface, which is essential for a successful installation.
Step 2: Installing High-Temp Underlayment for Moisture Protection
High-temperature synthetic underlayment is your roof’s primary moisture barrier, essential for the high heat of metal panels. Standard felt paper can dry out and crack, but synthetic materials withstand temperature extremes.
Self-adhesive (peel-and-stick) underlayment offers superior protection at the eaves against ice dams, while nail-down synthetic is a budget-friendly option for most applications. We install the underlayment starting at the eaves and working up, with a minimum 4-inch row overlap to ensure water sheds properly. We secure it with cap nails every 12 to 18 inches, ensuring it lies flat and wrinkle-free. This barrier also prevents condensation from forming between the metal panels and the roof deck.
Want to see the process in action? Learn How To Install Peel And Stick Underlayment for a detailed walkthrough.
Step 3: Installing Drip Edge and Closure Strips
These details separate amateur work from a professional metal roof installation. The drip edge is a metal flashing installed along eaves and rake edges to direct water into gutters and away from fascia boards. We overlap each piece by an inch, secure it with nails every 12-16 inches, and seal the seams with butyl tape.
Next, we install closure strips. These foam pieces are molded to match your panel profile and fill the gaps at the eaves and ridges. Adhered with butyl tape or sealant, they fit snugly to prevent pest and water intrusion. These small details make a huge difference in the longevity of your roof.
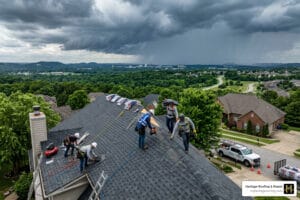
The Main Event: A Step-by-Step Guide to Metal Roof Installation
With the prep work complete, it’s time to lay the metal. Precision and adherence to best practices are critical during this stage to ensure every panel is secure, aligned, and watertight.
Step 4: Squaring the Roof and Aligning the First Panel
Getting the first panel perfectly straight is crucial for the entire metal roof installation. We use the 3-4-5 triangle method to ensure a square starting point. From a corner, measure 3 feet along the eave and 4 feet up the rake; the diagonal should be exactly 5 feet for a 90-degree angle.
Once square, we snap a chalk line reference parallel to the eave. The first panel is positioned along this line with a 1-inch eave overhang to direct water into the gutters. Take your time with this first panel—its perfect placement will save hours of frustration later.

Want to see this process in action? Find How To Square Your Standing Seam Metal Roof Panels for a detailed visual guide.
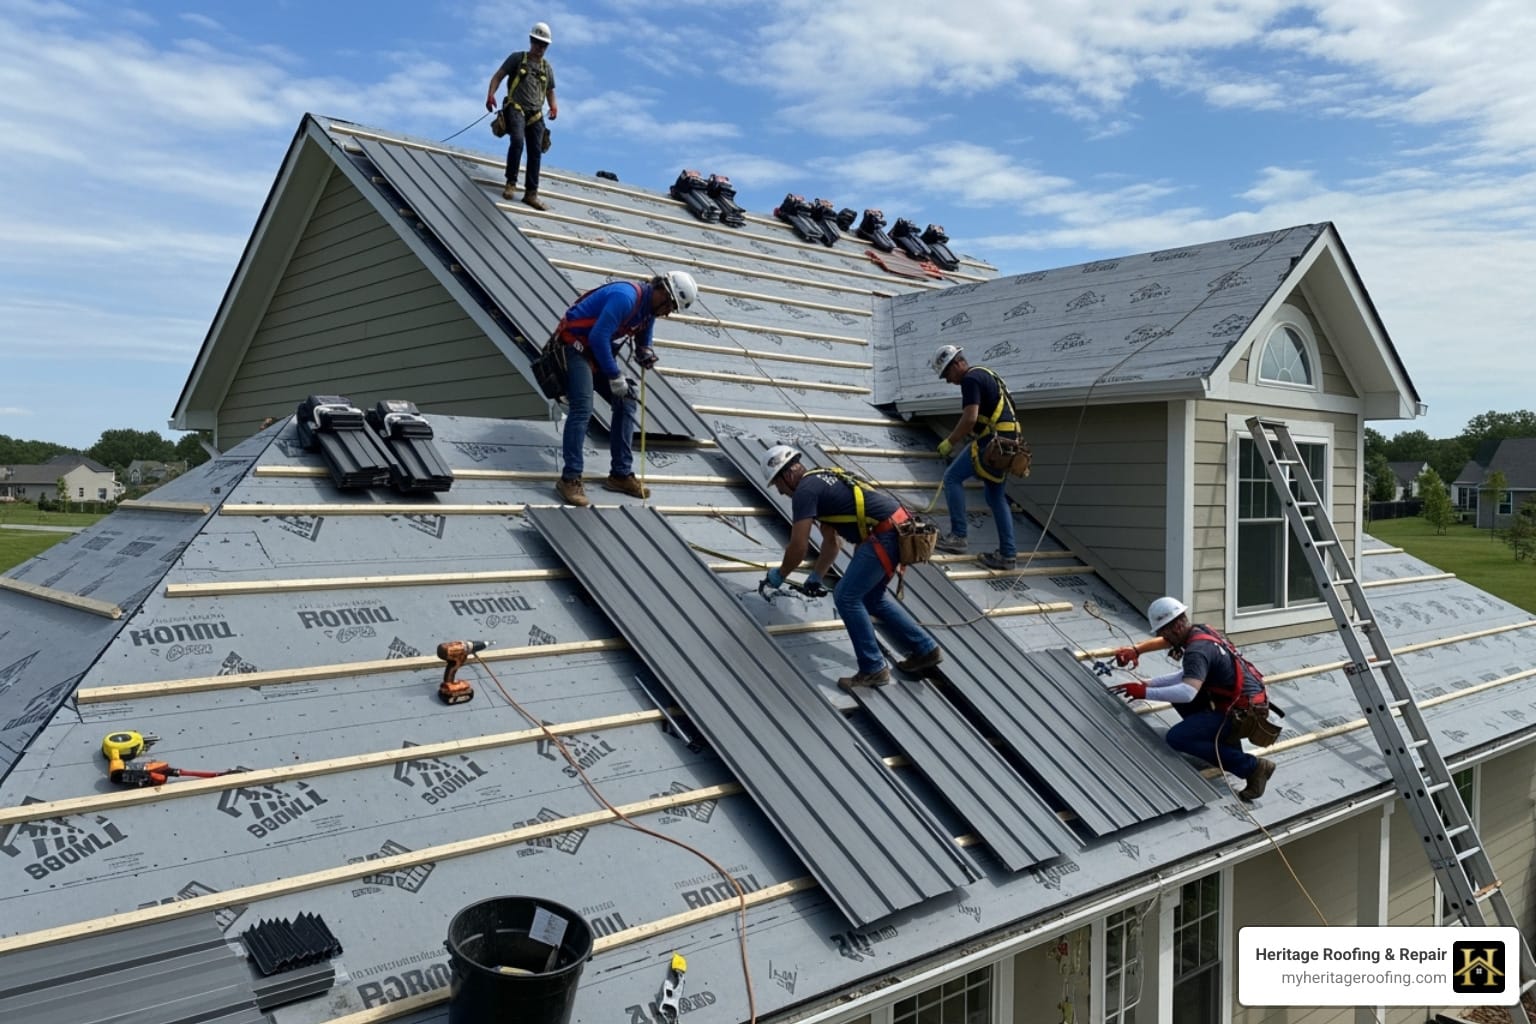
Step 5: Your Guide to Fastening Panels and Avoiding Screw Mistakes
Properly fastening the panels is a critical step that requires precision. Always use self-tapping screws with neoprene rubber washers, which create a watertight seal around each hole.
Screw placement is typically every 18-24 inches along structural supports. For corrugated panels, place screws in the flat sections, not on the ridges, to allow the washer to compress and seal correctly. The biggest mistake is over-tightening screws, which can deform the panel and damage the washer. Under-tightened screws are just as bad, leading to uplift and leaks. Use a torque-controlled drill set to the manufacturer’s specifications.
Ensure perpendicular screw alignment for a proper seal. If a screw goes in crooked, remove it, seal the hole with butyl caulk, and start fresh.
Step 6: Overlapping Panels and Sealing Seams for a Watertight Finish
For exposed fastener panels, ensure each panel overlaps by one full ridge with the previous one. This creates a natural barrier against water. For added protection, especially on lower-sloped roofs, we apply butyl tape between panels before securing them.
Take time to ensure proper panel nesting, making sure each new panel fits snugly against the last. Many modern panels have anti-siphoning channels—small grooves that prevent water from creeping between overlaps. It’s key to seal around these channels without blocking them. This meticulous process creates a continuous, impervious surface, ensuring water has no opportunity to get inside your home.
Finishing Touches: Flashing, Ridge Caps, and Final Checks
The final details are what separate an amateur job from a professional one. Properly installed flashing and ridge caps are the final line of defense against the elements, ensuring a polished look and a leak-free roof.
Step 7: Proper Flashing and Ridge Cap Installation
Properly installed flashing is your roof’s armor at its most vulnerable points, like valleys and walls, preventing leaks for years. Valley flashing is a wide metal channel installed where two roof planes meet. End wall and side wall flashing create a layered defense where panels meet vertical surfaces like dormers or chimneys.
The ridge cap is the final piece, sealing the peak of the roof. You can choose between vented or non-vented ridge caps. Vented caps promote airflow in the attic, which we recommend for most Arkansas homes. To install, we place closure strips along the ridge, apply sealant tape, and center the ridge cap. It’s then secured with screws that penetrate into the framing below. We overlap consecutive ridge cap pieces by about 6 inches, applying sealant between them to ensure a watertight finish.

Want to see the process in action? Watch a Ridge Cap Installation video. For homes that need extra ventilation, check out this Vented Ridge Cap Installation video.
Step 8: DIY vs. Hiring a Pro for Your Metal Roof Installation
After reviewing these steps, you might wonder if you can do it yourself. While the DIY spirit is admirable, metal roof installation is significantly more complex than asphalt shingles, especially standing seam systems.
Consider these factors before starting:
- Safety Risks: Working at heights with sharp metal poses serious dangers. Professionals use harnesses and follow strict safety protocols.
- Complexity & Tools: The project requires specialized tools like power shears and torque-controlled drills. Complex roofs with valleys or dormers demand expertise.
- Time Commitment: A DIY project can stretch for weeks, leaving your home exposed. Professionals can complete the job efficiently.
- Workmanship Warranty: When you hire a pro, the work is backed by a warranty. DIY mistakes are your own responsibility and expense to fix.
While a skilled DIYer might tackle a simple shed, your home deserves a professional touch to ensure a perfect metal roof without the risks or headaches.
Your Local Metal Roofing Experts in Northwest Arkansas
When it comes to metal roof installation in Northwest Arkansas, you want a team that understands the craft and the community. That’s where Heritage Roofing & Repair comes in. We’ve been perfecting our roofing techniques for over 50 years, with deep roots in the region, from Berryville to Harrison, AR.
Our commitment is to treat every home like our own, handling everything from material selection to final inspection. We provide dependable, affordable, and quality craftsmanship, ensuring your investment is protected for decades. We understand the challenges of Arkansas weather and build every roof to withstand it.
Ready to get started? We’re here to help.
Heritage Roofing & Repair
3458 Arkansas State Hwy 221, Berryville, AR 72616
(870) 654-1164
Conclusion
Metal roof installation is a significant upgrade that adds immense value, protection, and efficiency to your home. A properly installed metal roof doesn’t just protect your home; it transforms it into a more valuable and durable sanctuary that can last 40 to 70 years.
While this guide provides a comprehensive overview, the complexities of ensuring a perfectly sealed, long-lasting roof often require professional expertise. Every screw, seam, and flashing detail matters. The difference between a good installation and a great one comes down to experience.
That’s where professional expertise becomes invaluable. When you choose an experienced professional, you’re investing in peace of mind, workmanship warranties, and the confidence that your roof was installed to the highest standards. The satisfaction that comes from a job done right is why we’re passionate about our craft.
For a professional assessment and expert installation in the Harrison area, contact our team today. Let’s work together to give your home the protection and beauty it deserves for decades to come.